
Before embarking on the repair journey, it's vital to take adequate preparation and safety measures. Start by ensuring the toilet's water supply is turned off to prevent any water leaks during the repair process. Equip yourself with rubber gloves; these will protect your hands from grime and potential harsh chemicals. Gather necessary tools such as screwdrivers, pliers, and plumber’s putty to streamline the repair task. Additionally, check for any other underlying plumbing issues. If you're unsure about your assessments, consulting a manual or seeking professional advice can save you from future complications.
The initial step involves carefully disconnecting the toilet from its water supply. Remove any decorative caps that may cover the bolts, as these need to be unscrewed using a wrench. Gently lift the toilet from its base, taking care not to damage the wax seal in the process. With the toilet out of the way, turn your attention to the flange. Inspect it thoroughly for any physical damage, rust, or deterioration that might require a specific approach for repair. Documenting these findings can be crucial for future reference or if professional consultations become necessary later on.
Determining the extent of the flange damage is essential in deciding the repair strategy. Check for cracks, corrosion, or if the flange is entirely broken, as these conditions will dictate the repair route. Evaluate the surrounding area, paying close attention to the wax seal for any additional issues that might also need addressing. Depending on the damage severity, you must decide whether a simple toilet flange repair kit will suffice or if a complete flange replacement is warranted. Always compare your findings with reputable plumbing resources or consider seeking professional guidance.
To apply the repair kit successfully, follow the manufacturer's instructions closely. This often begins with cleaning the flange area meticulously to ensure no debris impedes the process. Position the new flange or sealing ring precisely to ensure it stands firm and level with the floor. If the kit requires an adhesive, apply it and allow it to set as per the instructions to prevent any future leaks. Double-check all connections and the repaired flange's stability before proceeding to the next steps.
The next step is carefully lowering the toilet back onto the newly repaired flange, ensuring that the bolts align correctly. Reconnect the water supply and flush the toilet to verify that no leaks are present before tightening the bolts. Use a level to ensure the toilet sits evenly on the floor, making adjustments as necessary. Conclude with a thorough check to confirm the toilet's stability and cleanliness of the installation area, thus ensuring everything is in order after the repair.
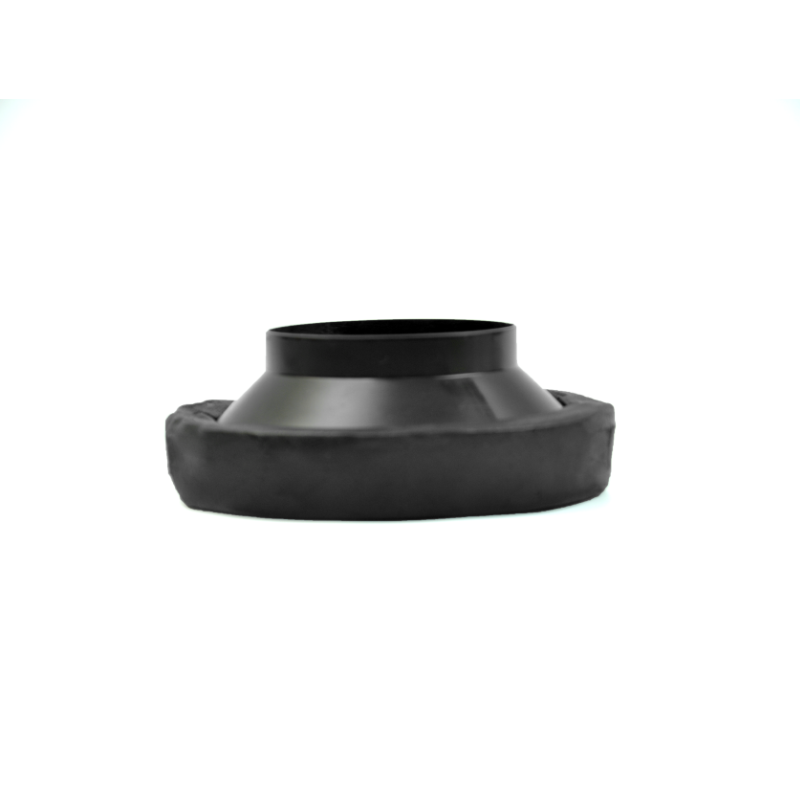
The Thickened Rubber Toilet Bowl Flange Ring is engineered for those seeking a robust and leak-proof solution for toilet flange repairs. This product is crafted from high-density rubber, which provides an exceptional combination of flexibility and durability, especially during installation. Many users rave about its straightforward installation process, emphasizing its reliability in maintaining a secure seal under various conditions. Given the positive feedback, it is advisable to peruse user reviews and ratings to find trustworthy brands that offer this effective solution.
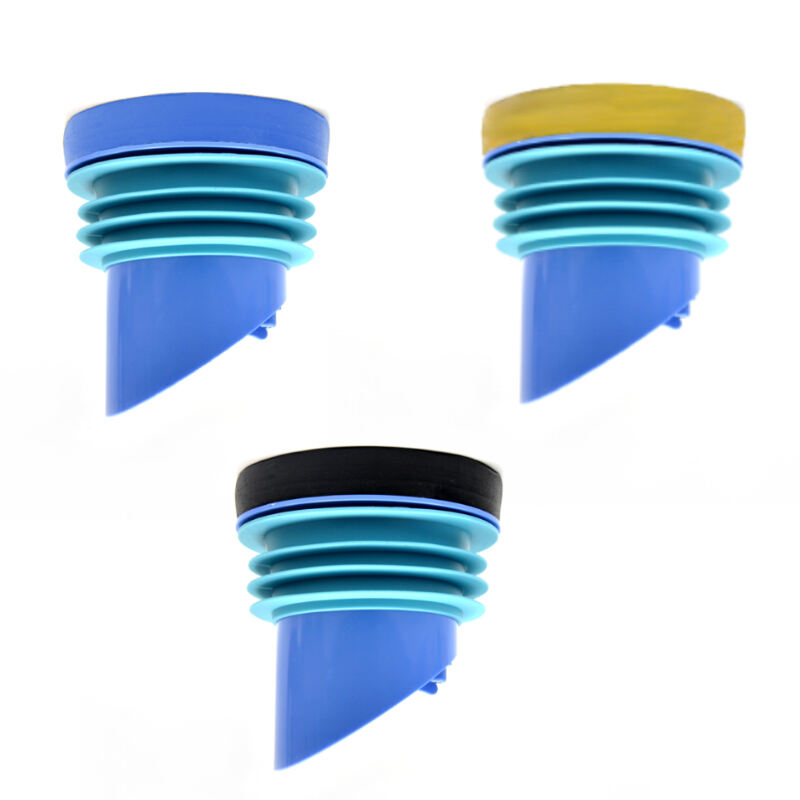
A standout choice for swift and permanent toilet repairs, the Durable Leak-Proof Rubber Toilet Seal Flange minimizes the need for traditional wax rings. The strong advantage lies in its ability to maintain an effective seal, even after prolonged usage – a quality acclaimed by many customers. The seal's resilience against mold and mildew further ensures a hygienic bathroom environment. When selecting this product, remember to consider its temperature tolerance to ensure it fits the environmental requirements of your bathroom and provides optimal performance over time.
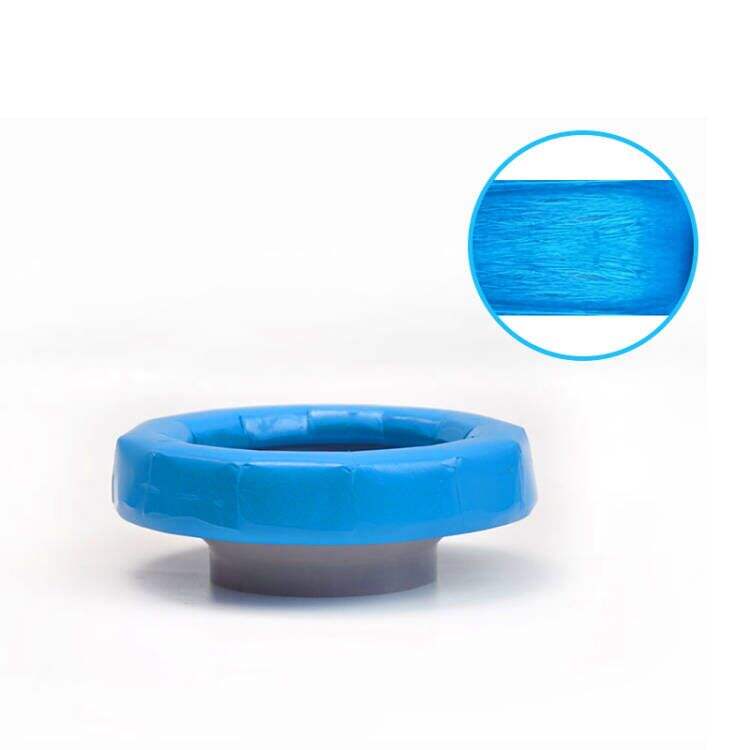
The Nanotech Elastic Rubber Toilet Seal Solution represents a leap forward in adaptable sealing technology, drawing on advanced nanotechnology for superior elasticity. This innovative seal quickly conforms to various shapes, forming a dependable and enduring bond that requires minimal upkeep. For more insights, reviewing customer experiences can be enlightening, especially for installations presenting significant challenges. Additionally, probing into the seal's performance metrics can substantiate its claims of longevity and efficiency, distinguishing it from more conventional methods.
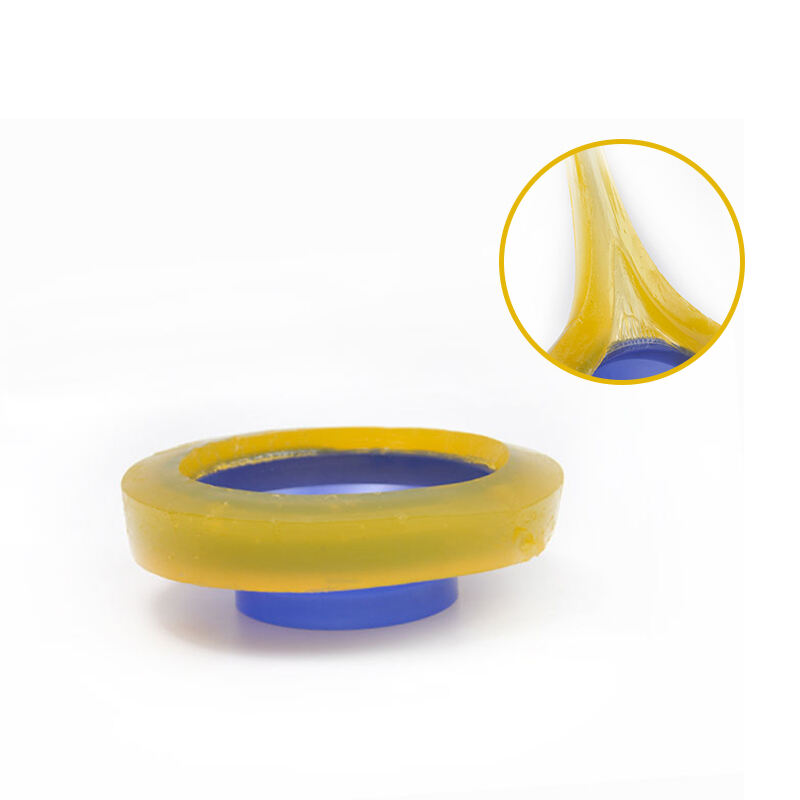
The Triple Seal Flange with Backflow Prevention stands out for its sophisticated triple-sealing technology. This feature provides top-level leakage prevention, bolstered further by integrated backflow prevention capabilities. It serves as a reliable solution, particularly for older plumbing systems prone to backflow issues. Potential buyers should check for any relevant certifications or adherence to plumbing standards, which can enhance consumer trust in this product. For firsthand insights into its effectiveness and ease of installation, consider reading user testimonials.
Preventing future flange damage plays a crucial role in maintaining the overall health of your toilet's plumbing system. Regular inspections can help you detect leaks or cracks early, ensuring timely repairs. By opting for high-quality toilet paper and being cautious not to flush items that are non-degradable, you can avoid unnecessary strain on plumbing fixtures. Periodic professional inspections and cleanings are advisable as they can identify potential problem areas before they become significant issues. Furthermore, educating yourself on the early signs of flange deterioration can empower you to take swift action before small issues escalate into costly repairs.
Common installation challenges with toilet flanges can be effectively managed with a few practical tips. Uneven flooring levels are a frequent problem, but using shims can help in leveling the toilet to prevent wobbling. If you encounter stubborn old bolts during removal, applying penetrating oil can make the task significantly easier. It's beneficial to consult plumbing resources or online tutorials specific to your installation challenges, which can provide expert recommendations and solutions. Equipping yourself with the right tools, such as spare nuts and a good wrench set, can greatly reduce installation frustrations and ensure a smoother setup process.
Knowing when to replace or repair a toilet flange is essential for maintaining an efficient plumbing system. Evaluating the extent of damage is the first step; sometimes, a simple repair might only serve as a temporary fix. Severe corrosion or a complete breakage typically necessitates a full replacement, which, while potentially more costly upfront, can prevent further issues down the line. Weighing the costs against practicality is crucial—while repairs may seem cheaper initially, replacements can offer peace of mind and longevity. Consulting with a plumbing professional can also provide clarity, ensuring that you make informed decisions suited to the condition of your plumbing system.
Copyright © Xiamen Pro-made Sanitary Ware Technology Co.,Ltd - Privacy policy